Paquet Builder offers a wealth of features, which can feel overwhelming to beginners. This quick tutorial demonstrates how to create a functional Self-Extracting package in a few easy steps, ideal for those new to the tool.
Goal
Add source files to a package and create a Self-Extracting EXE file.
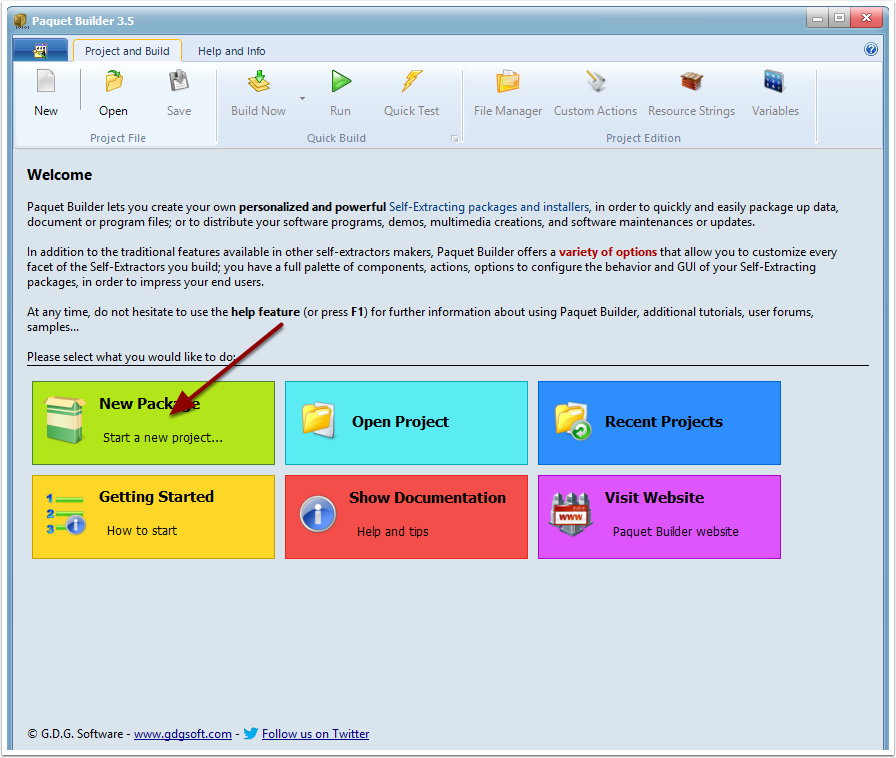
1. Start Paquet Builder and Choose “New Package”
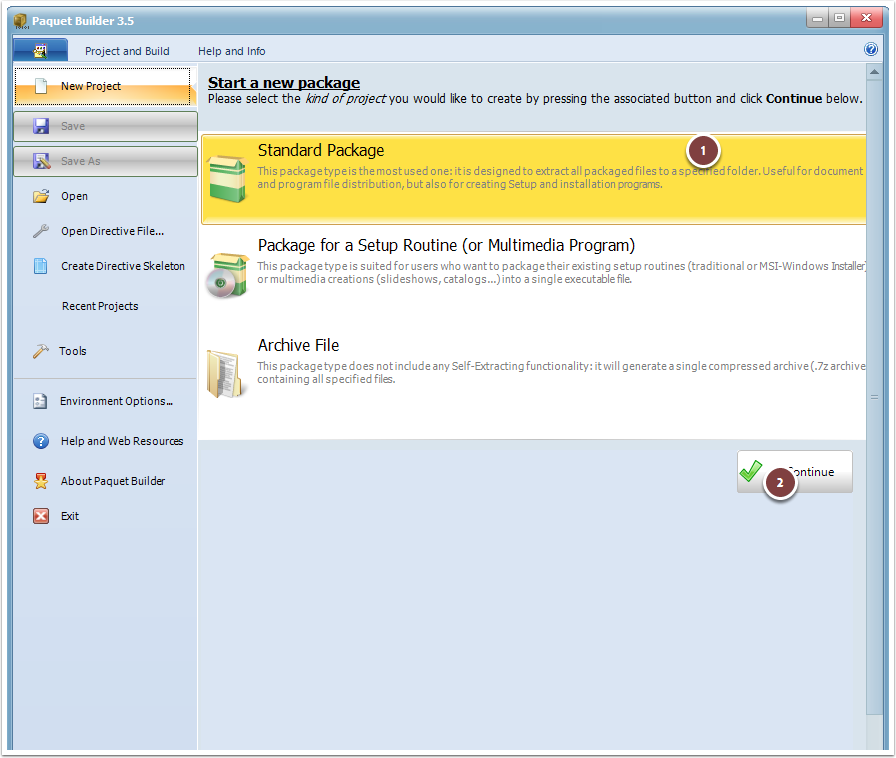
2. Choose “Standard Package” and Validate
3. Enter the Title and Company Information
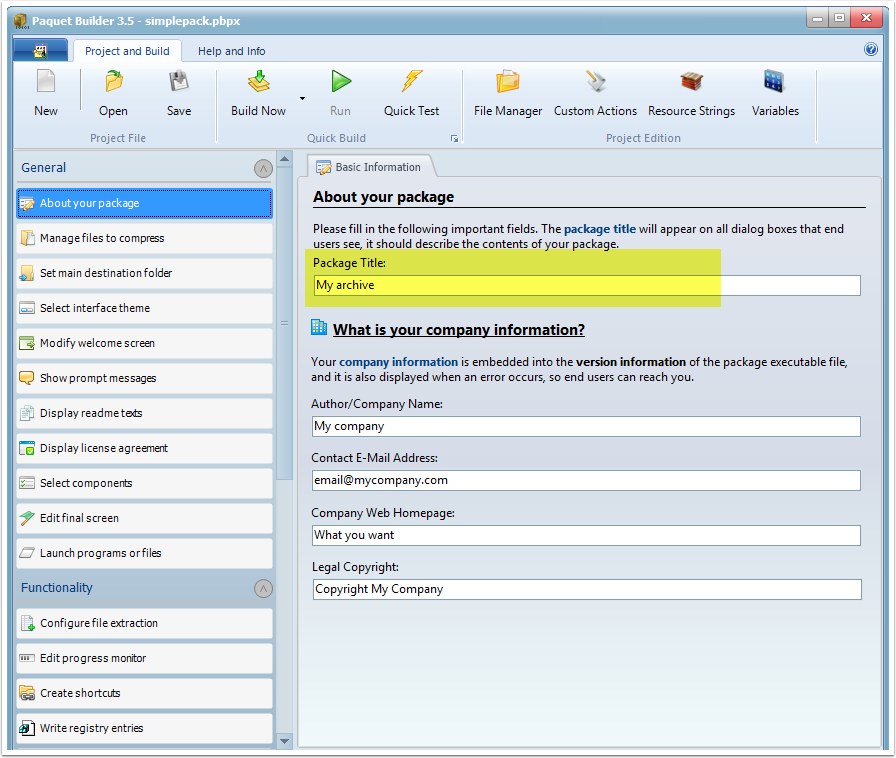
On the “About Your Package” page, enter a title such as “My Archive Tutorial”. If the company information fields are empty, fill them in as well.
4. Add Source Files to Your Package
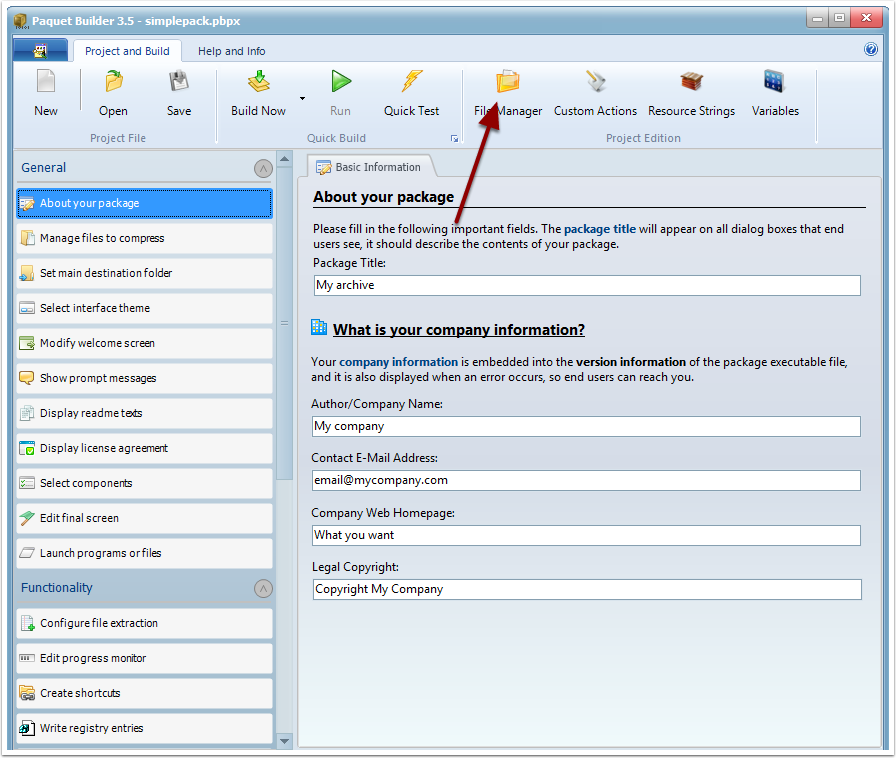
Click File Manager to include the files you want to compress.
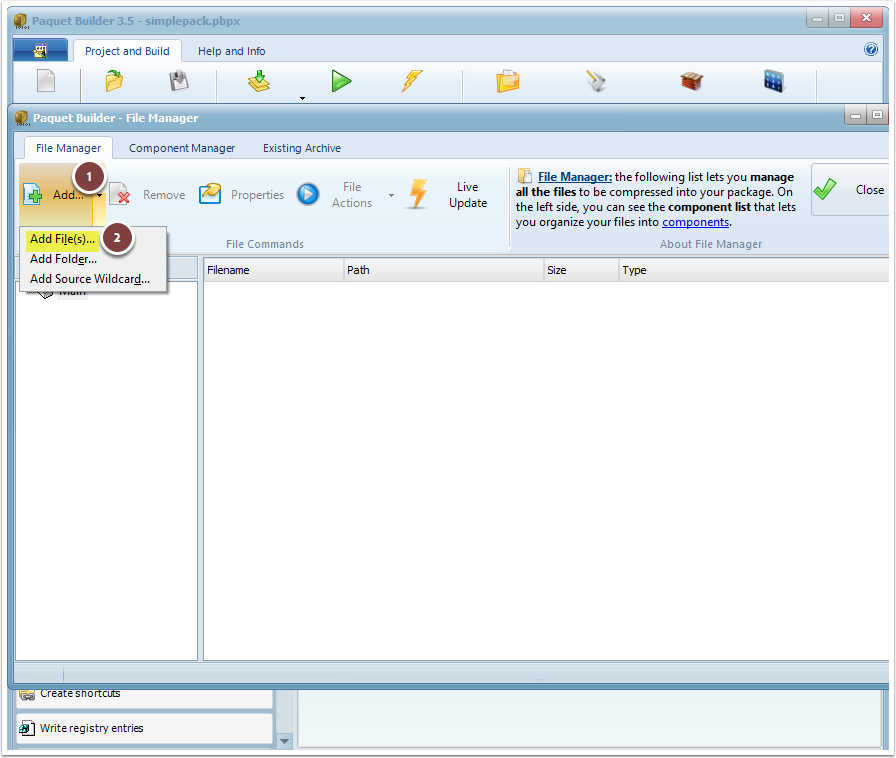
4.1 Add Files
Choose Add or drag and drop files directly from Windows Explorer.
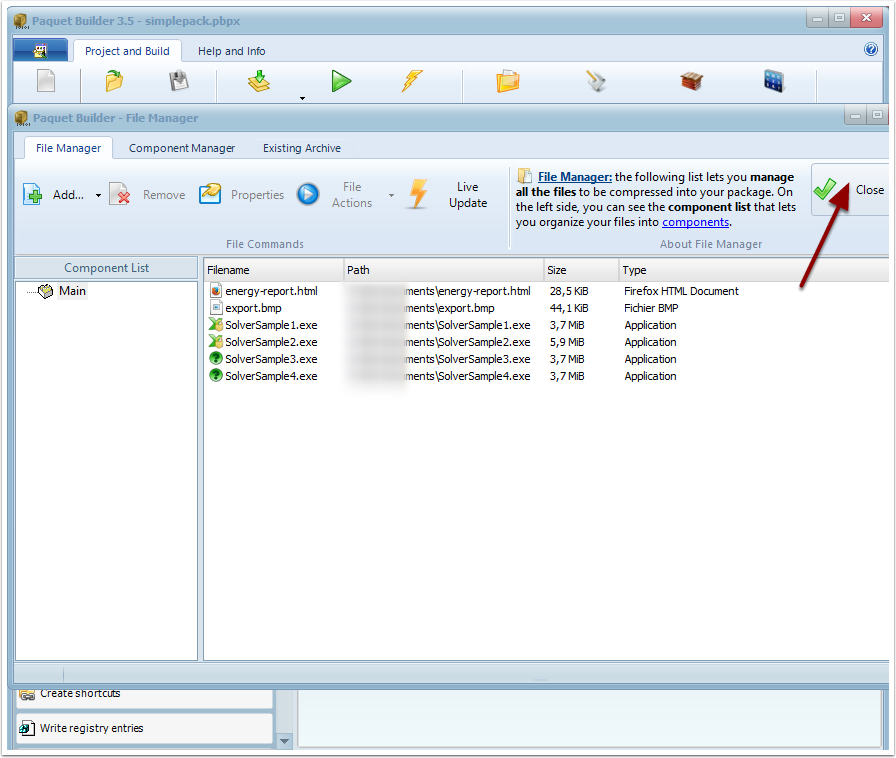
4.2 Close the File Manager
5. Set the Default Destination Folder
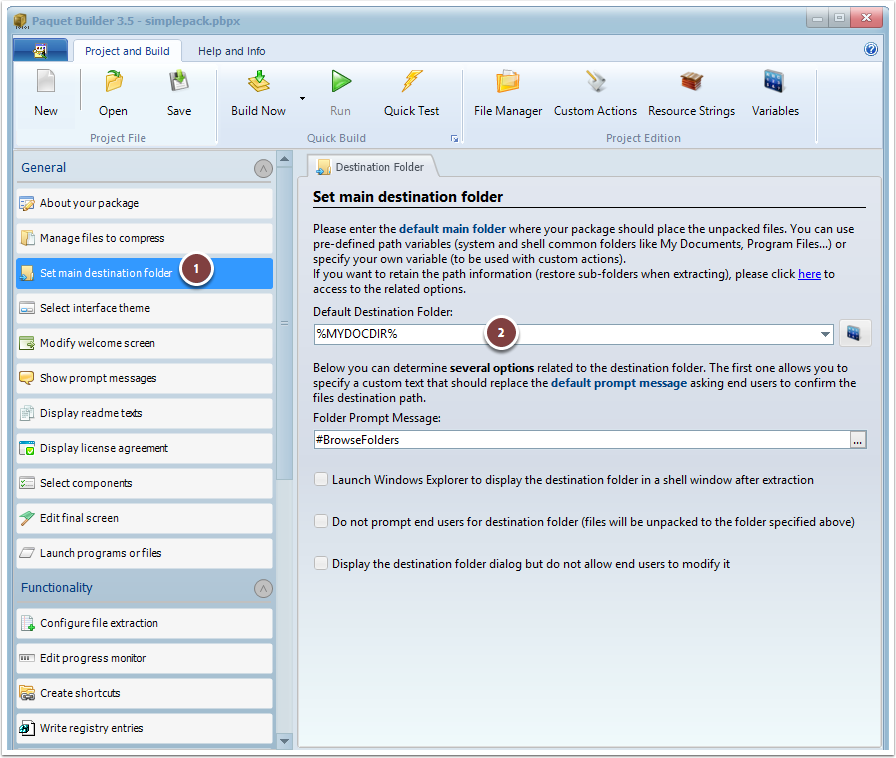
Specify the default folder where the files will be extracted. Use %MYDOCDIR%\My Archive Tutorial to extract files to the “My Documents” directory on the user’s computer.
6. Create a Welcome Screen
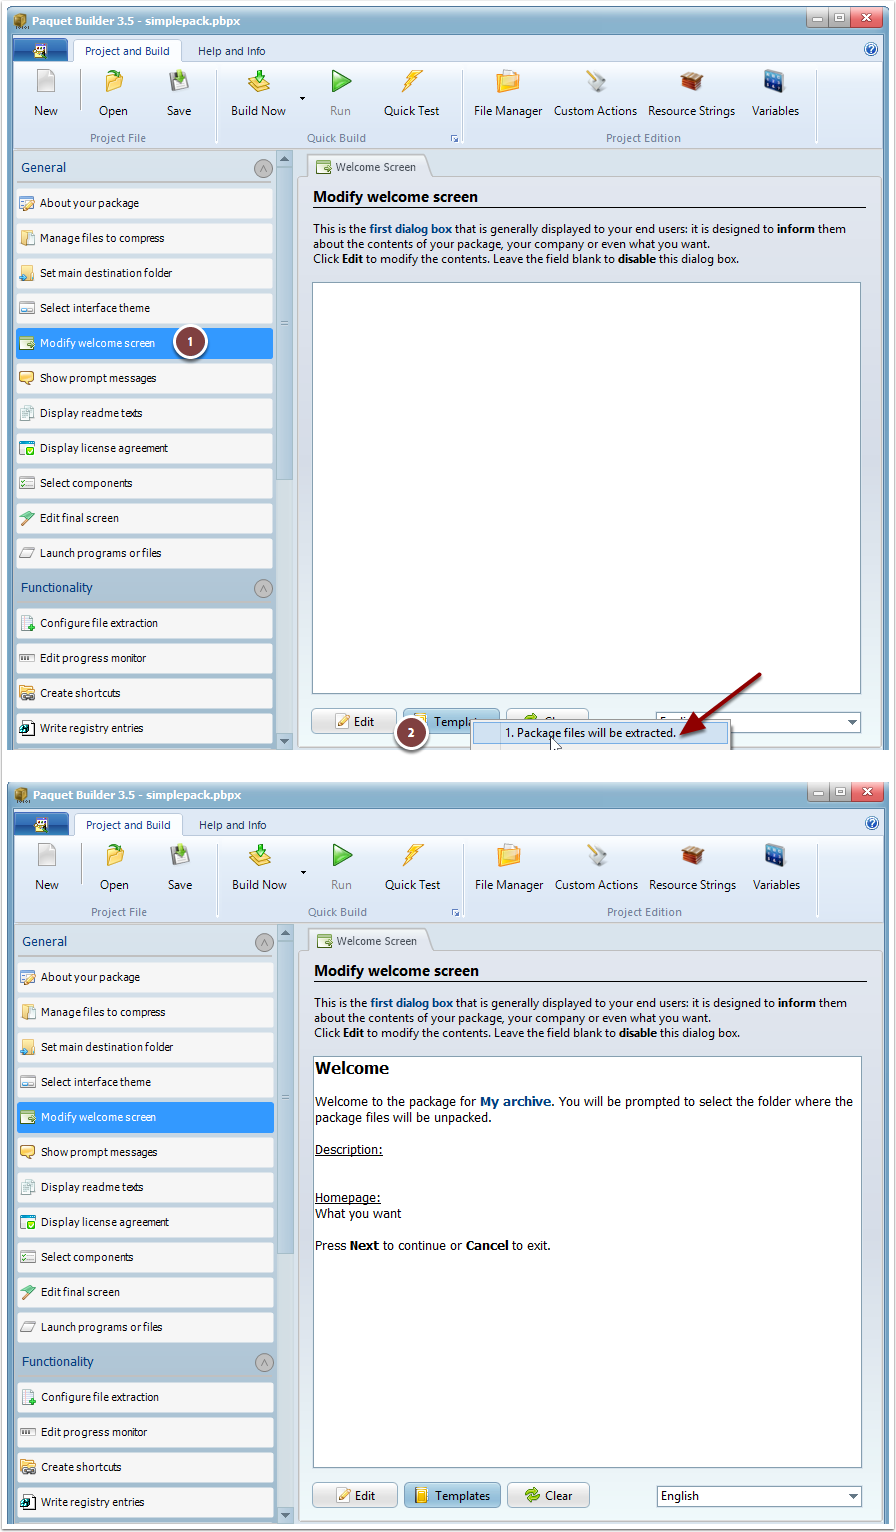
Click Edit to open the Rich Text Pad editor and add a welcome message, such as:
Welcome! This package will extract the files for My Archive Tutorial.
Press OK to save your changes.
7. Specify the Output EXE File
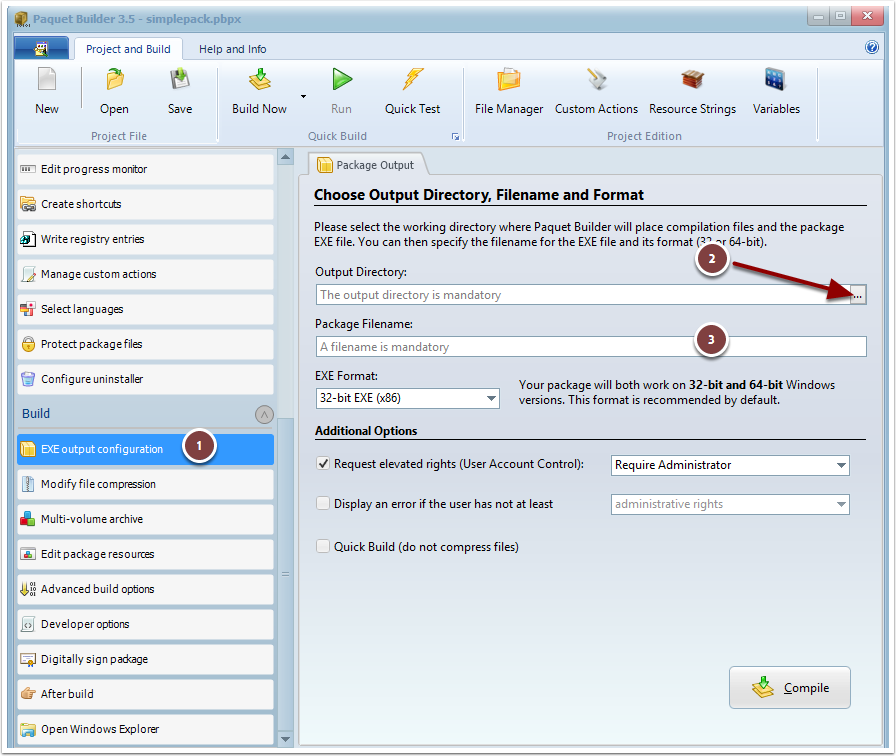
Under EXE Output Configuration, enter the full path and filename for the Self-Extracting installer that will be generated.
8. Build the Package
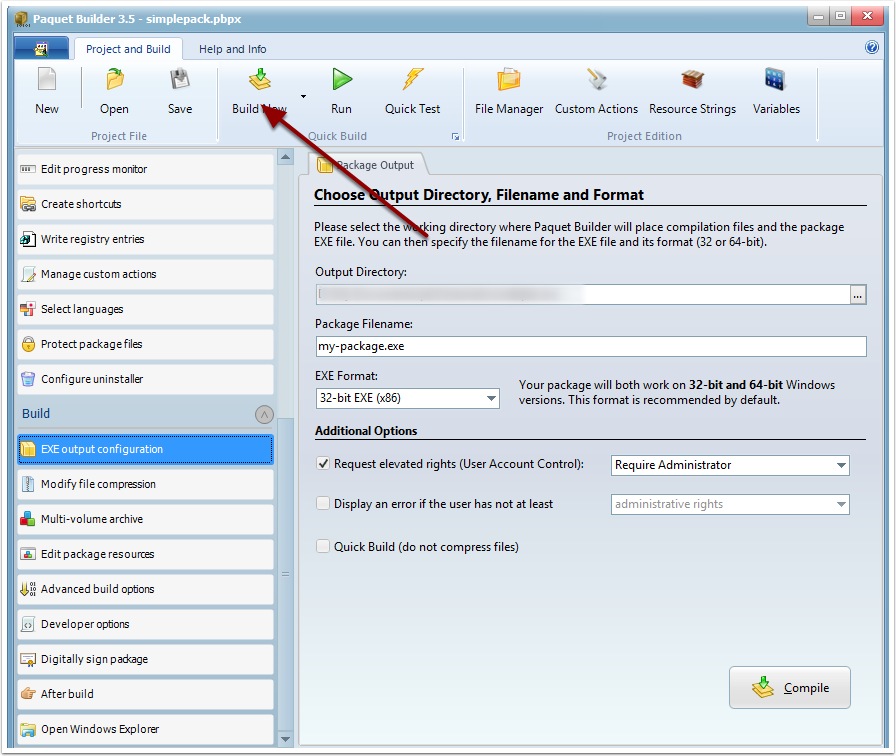
Click Build Now to compile your Self-Extracting EXE file.
9. Test and Distribute
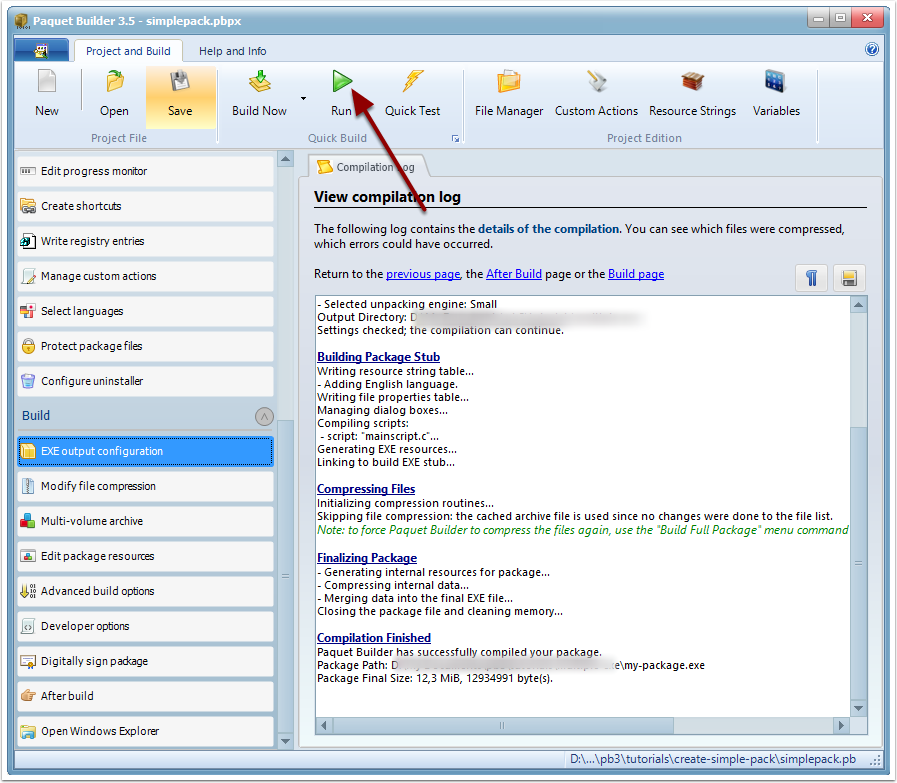
After compilation, your package is ready for distribution. Test it on your computer by clicking Run.
10. Verify the Package Execution
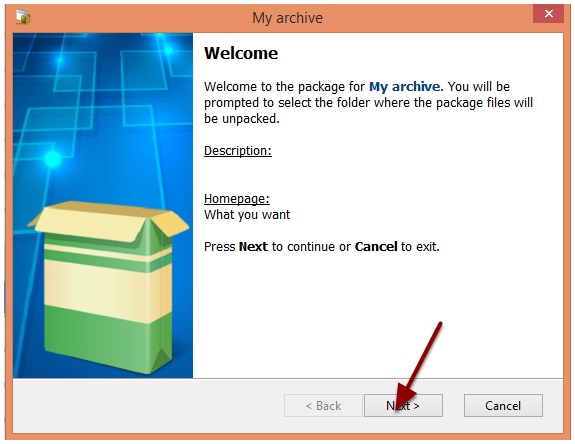
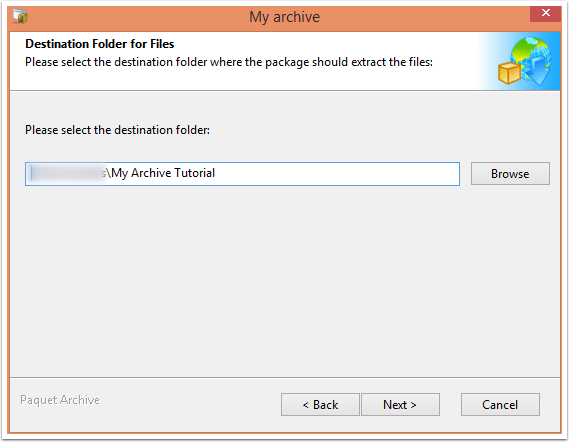
When the package runs, it displays the Welcome Screen and prompts the user for the destination folder.
Customization Options
You can further customize your package by modifying settings such as the “Paquet Archive” or adding custom images to the wizard.
