Using Paquet Builder, you can configure your Self-Extracting installer package to execute multiple EXE files sequentially after extraction. This guide walks you through the process step-by-step.
- Open the File Manager
Start by adding the EXE files you want to include in your installer package. These files will be executed after the extraction process.
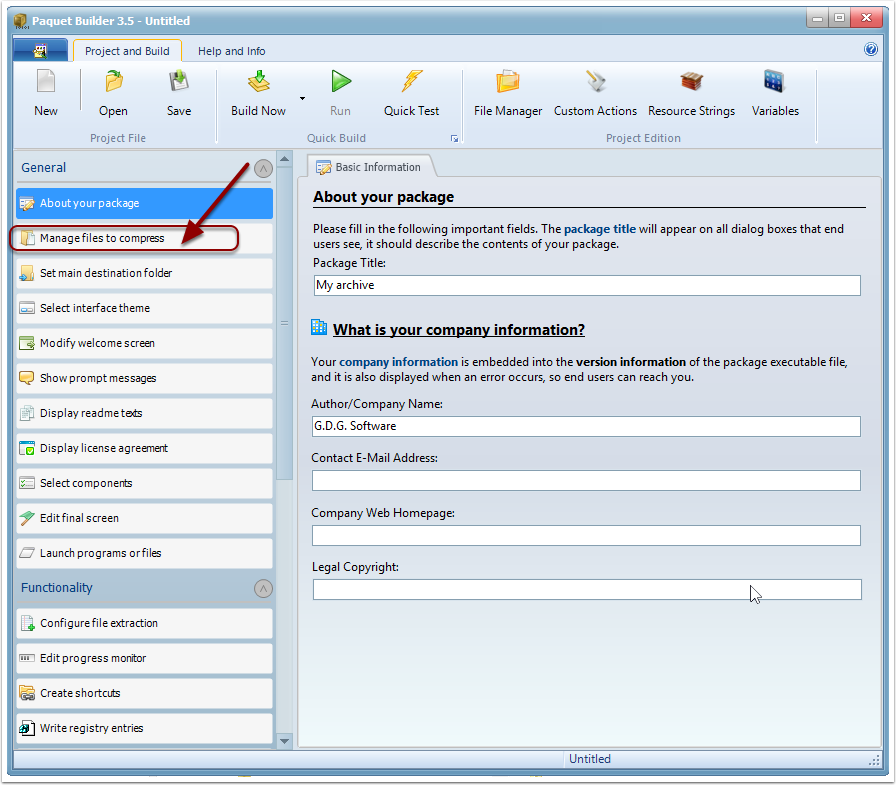
- Select the EXE Files to Compress
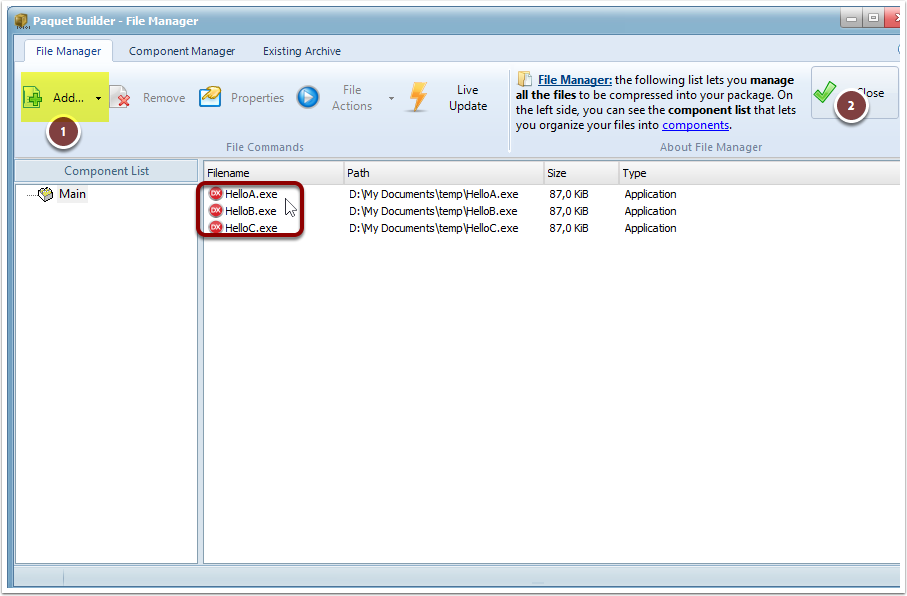
For this tutorial, we’ve chosen three EXE files. You can easily add files by dragging and dropping them into the File Manager.
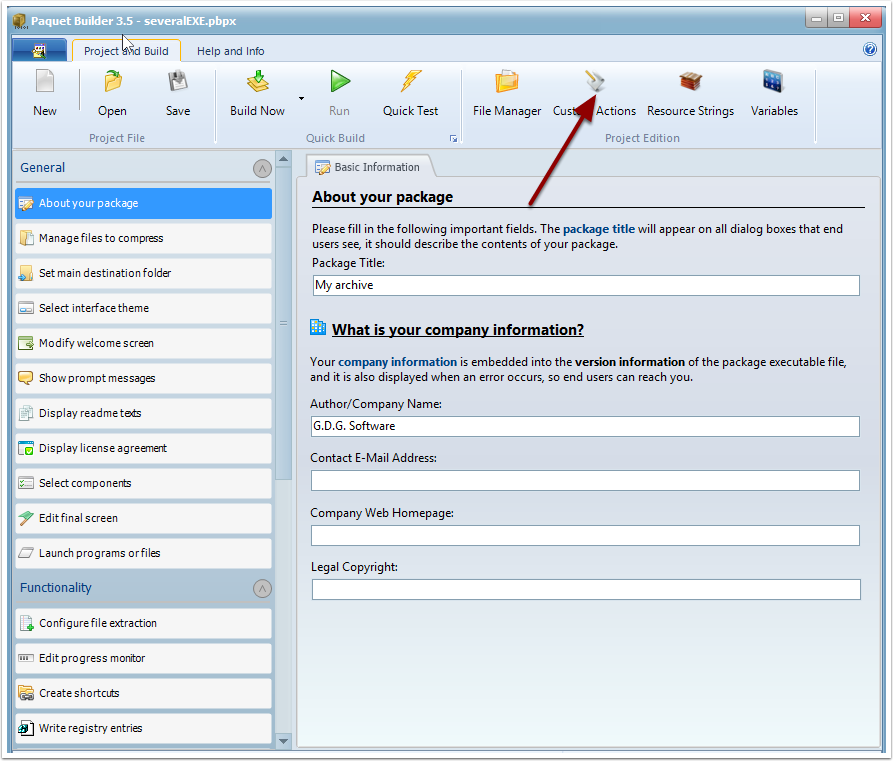
- Open the Custom Action Editor
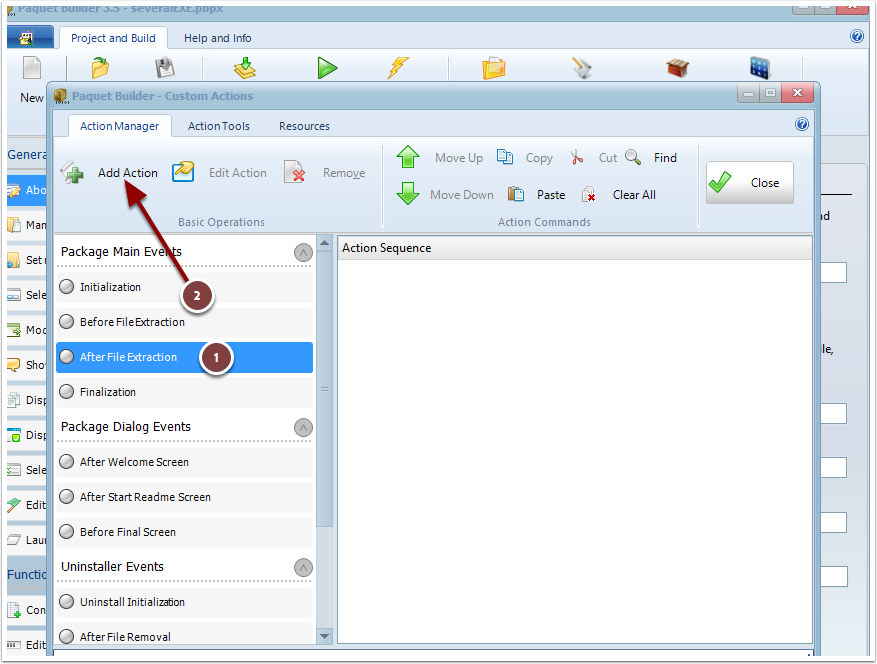
- Choose “After File Extraction” and Click “Add Action”
- Select “Execute a Program File”
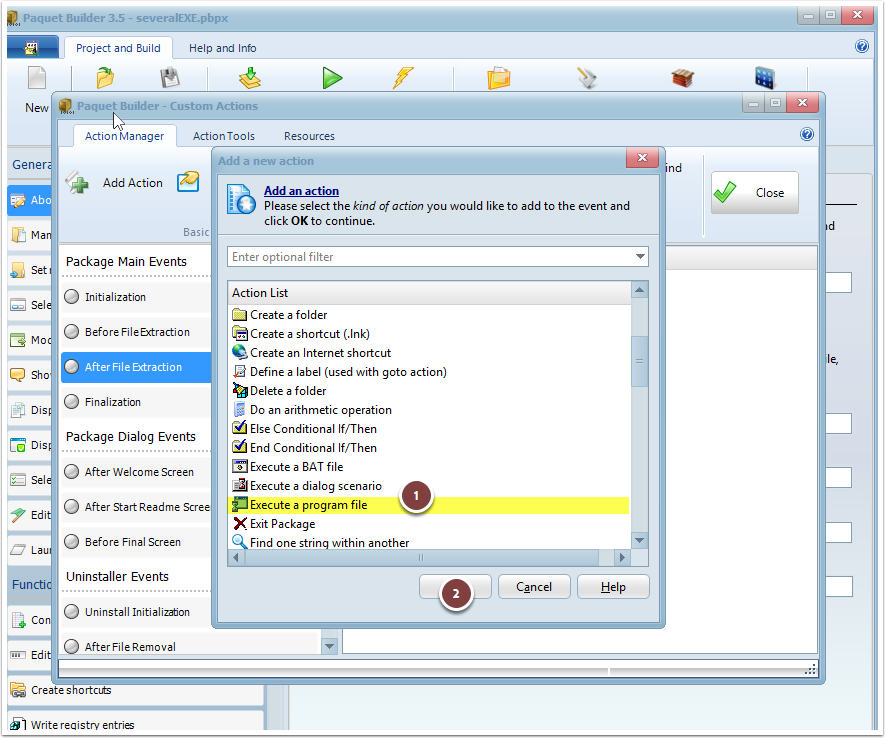
- Specify the Path to the First EXE File
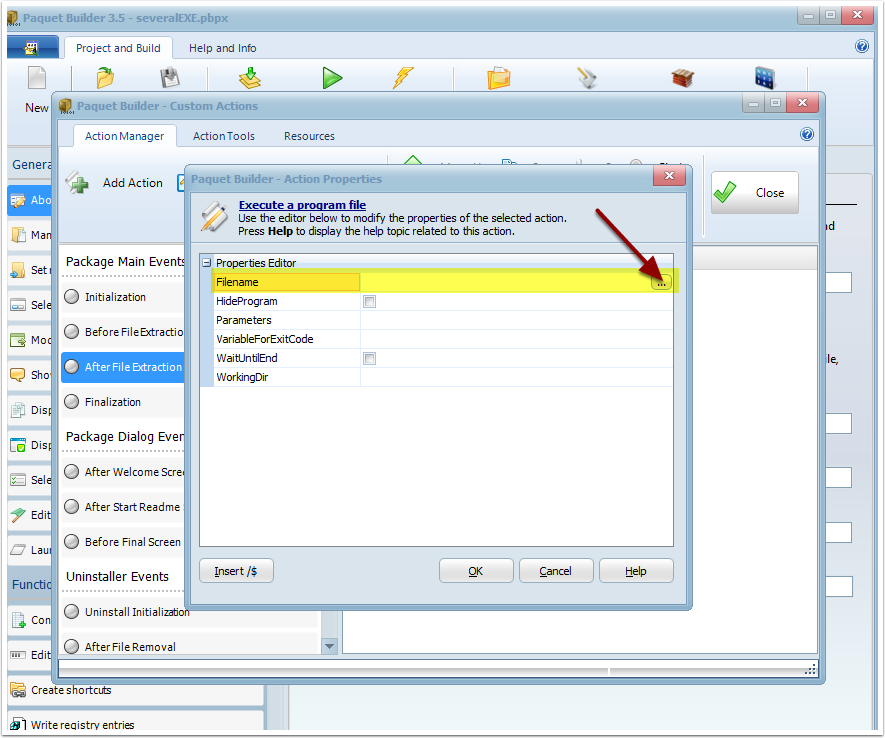
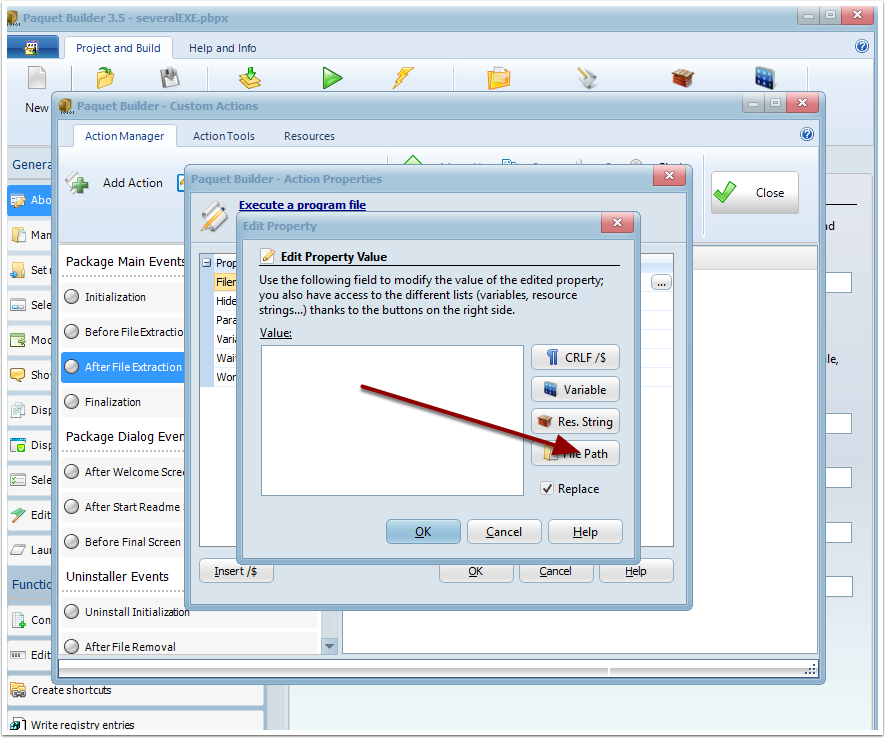
6.1 Choose File Path
6.2 Select the First Program EXE in the List
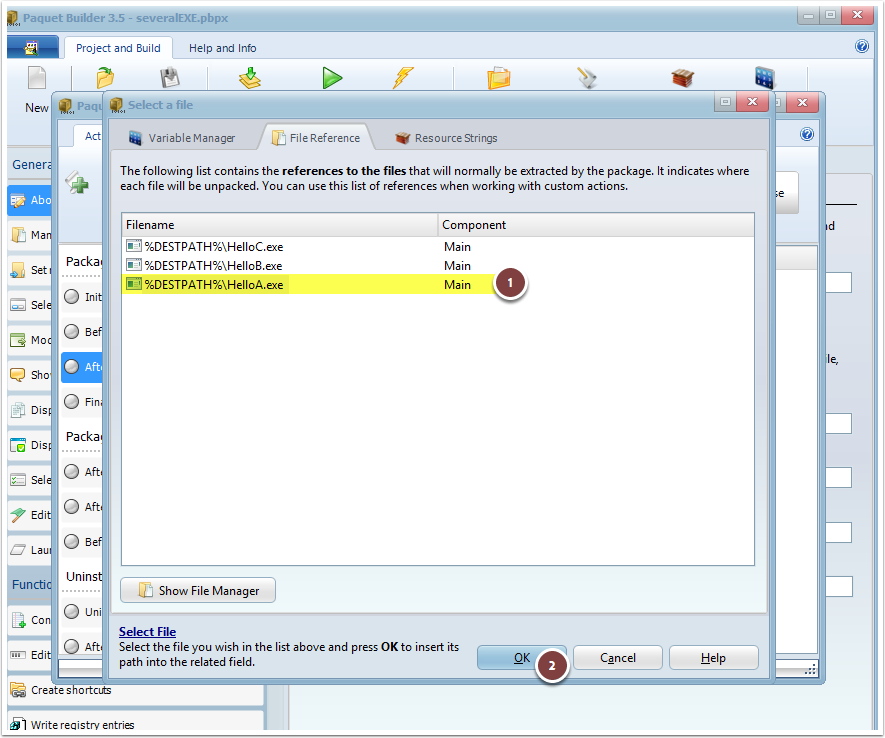
For this tutorial, the first file is HelloA.exe. In Paquet Builder, STPATH% represents the folder where files are unpacked.
6.3 Confirm Your Selection

6.4 Enable “WaitUntilEnd” and Confirm
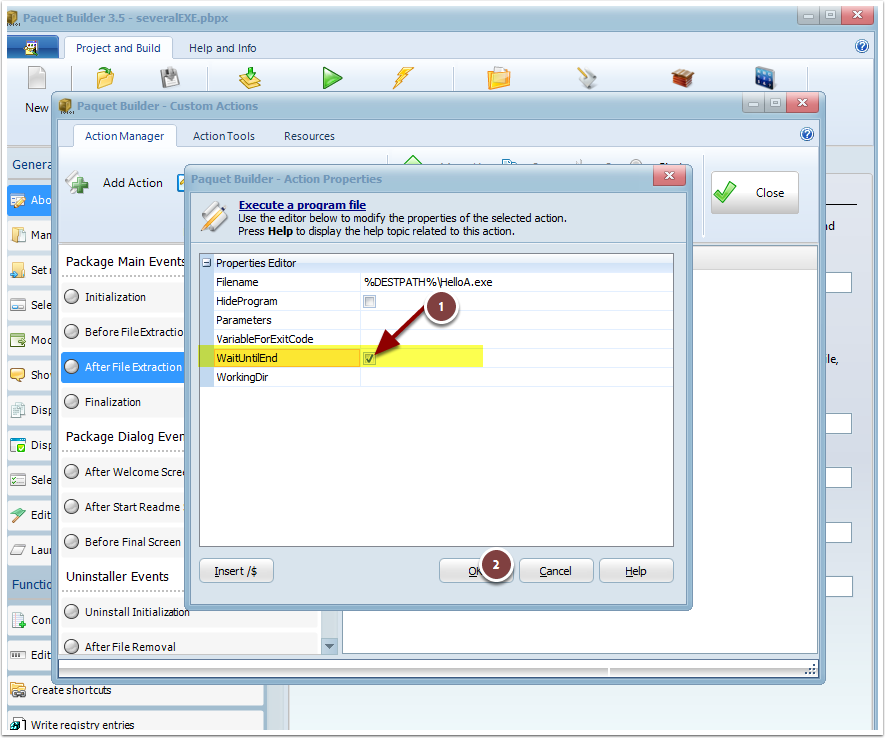
This option ensures that the package waits for the first EXE file to finish running before proceeding to the next. This is a crucial step.
- Configure the First EXE to Run After Extraction
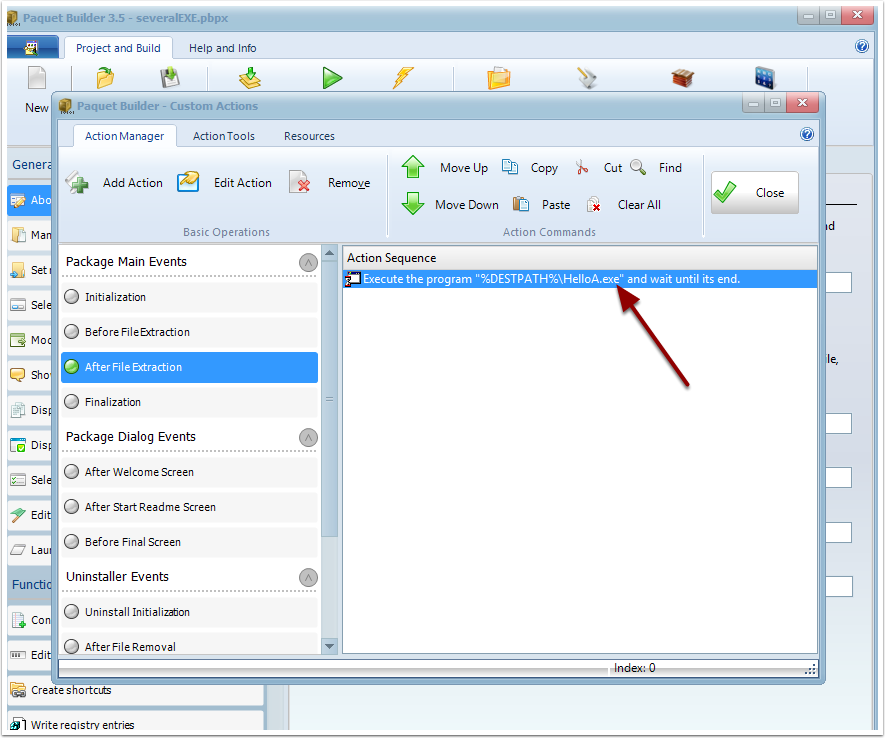
- Duplicate the Action for the Remaining Files
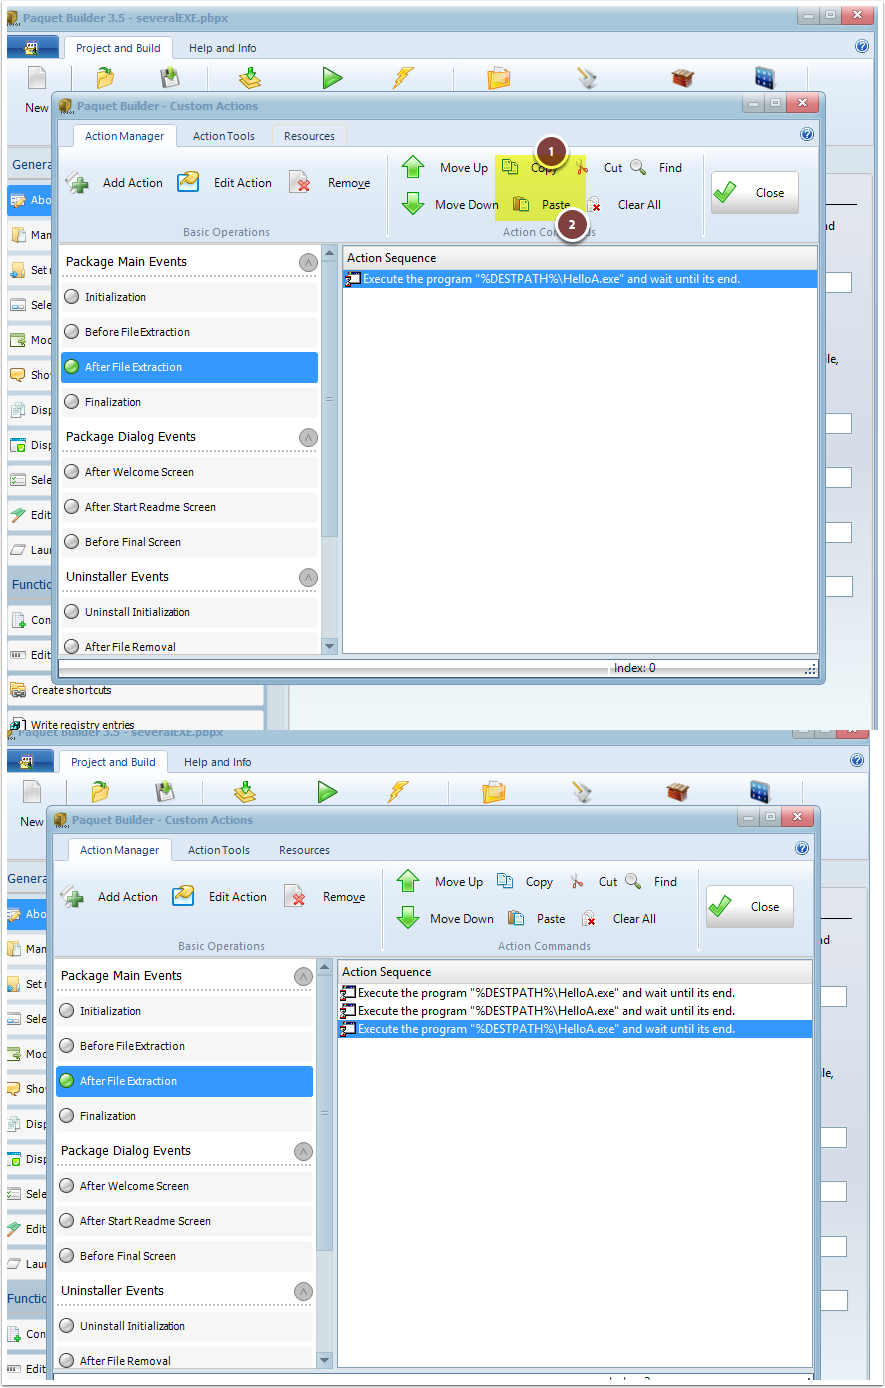
Copy and paste the first action twice. Edit each duplicate to specify the paths for the remaining EXE files (HelloB.exe and HelloC.exe in this example).
- Validate All Actions
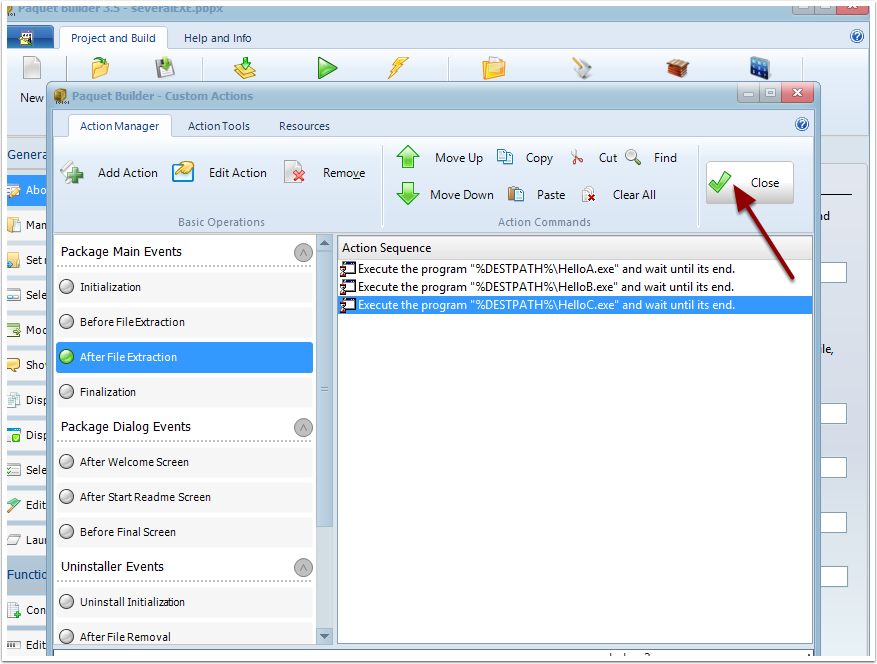
- Save and Build Your Project
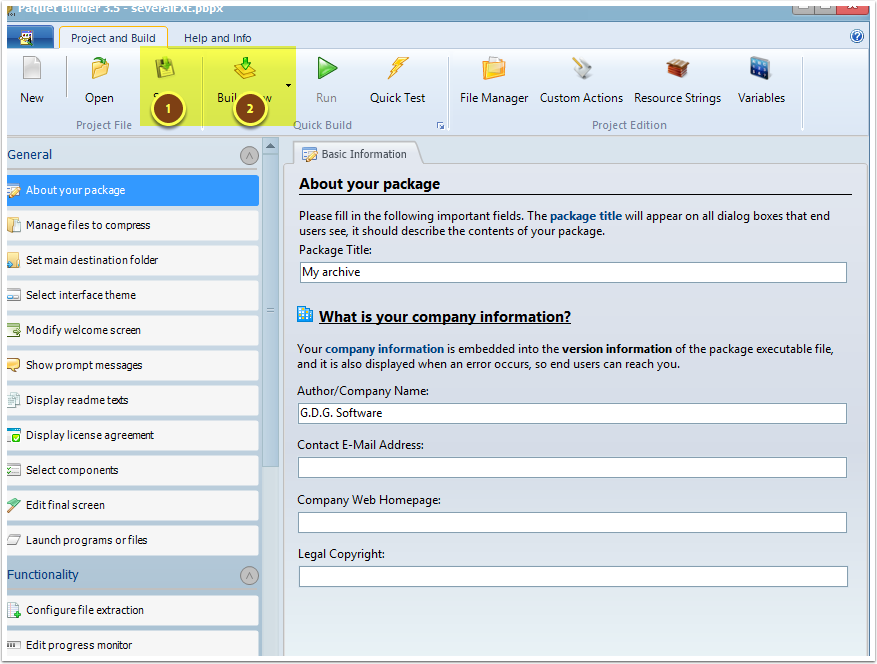
Once configured, the Self-Extracting installer will extract the files and sequentially execute HelloA.exe, followed by HelloB.exe and HelloC.exe, waiting for each to finish before proceeding.
